Ingredient Peppermint Fudge: Melt, Stir, Chill for Festive Fun
The air grows crisp, holiday lights twinkle, and the scent of peppermint fills the kitchen – it can only mean one thing: it’s time for festive treats! Among the most cherished and surprisingly simple confections is a delightful
peppermint fudge recipe. Forget the intimidating candy thermometers and complex techniques often associated with fudge making. This is a recipe designed for joyous ease, allowing you to create rich, minty squares that are perfect for gifting, sharing, or simply indulging in by the cozy fire.
For years, home bakers have sought out that perfect, no-fuss fudge, especially during the bustling holiday season. What if we told you that the secret to incredibly decadent fudge lies in just a few humble ingredients and a method so straightforward it can be summarized in three simple actions: melt, stir, and chill? That's the beauty of this particular peppermint fudge, a beloved tradition that brings cheer without the stress. It’s an ideal choice for anyone looking to whip up a batch of homemade goodness quickly, making it a truly
Quick Holiday Peppermint Fudge: Your Easiest Christmas Treat.
The Sweet Secret: Sweetened Condensed Milk Fudge Magic
At the heart of this incredibly easy
peppermint fudge recipe is one star ingredient that revolutionizes the process: sweetened condensed milk. This thick, sweet concoction is a game-changer, eliminating the need for precise sugar cooking and the dreaded candy thermometer that often sends aspiring fudge makers running.
So, what makes sweetened condensed milk so magical for fudge? It’s a brilliant combination of cooked milk and sugar, which already has the perfect consistency and sugar concentration to create a smooth, creamy fudge texture once combined with chocolate. When you melt chocolate chips with sweetened condensed milk, the milk's inherent sugar and emulsifying properties ensure a stable, velvety base that sets beautifully. This method, often referred to as "no-cook" or "no-bake" fudge (though a bit of melting is involved!), simplifies the process down to its most basic elements. It's truly an
Easy Peppermint Fudge: Sweetened Condensed Milk, No Thermometer dream come true.
Traditional fudge recipes rely on heating sugar to precise temperatures to achieve the right crystalline structure. Sweetened condensed milk bypasses this entirely, delivering consistent results every time with minimal effort. This means less time worrying about sticky messes and more time enjoying the festive spirit and, eventually, the delicious results!
Crafting Your Festive Peppermint Fudge: Melt, Stir, Chill
The journey to delightful peppermint fudge is surprisingly short and incredibly rewarding. The core steps are exactly as the title suggests: melt, stir, and chill. Let's break down how to achieve this festive confection.
Melting Your Chocolate Base
The first step is to melt your chocolate with the sweetened condensed milk. You have a couple of excellent options for this:
*
Stovetop Method (Double Boiler Preferred): Many fudge enthusiasts prefer the stovetop method, particularly using a double boiler. This involves placing your chocolate chips and sweetened condensed milk in a heatproof bowl set over a saucepan of simmering water (ensuring the water doesn't touch the bottom of the bowl). The gentle, indirect heat of a double boiler prevents the chocolate from scorching, allowing for a smooth, even melt. Stir frequently with a rubber spatula or wooden spoon until the mixture is completely smooth and glossy.
*
Microwave Method: For ultimate speed, the microwave is a fantastic alternative. Combine your chocolate chips and sweetened condensed milk in a microwave-safe bowl. Begin by microwaving for 1 minute, then stir well. Continue microwaving in 30-second intervals, stirring vigorously after each, until the chocolate is fully melted and the mixture is smooth. The key here is *constant vigilance* and *frequent stirring* to prevent overheating, which can cause the chocolate to seize or burn.
For the richest flavor, a combination of dark and semi-sweet chocolate often provides a perfect balance, allowing the vibrant peppermint to shine without being overly sweet. Once your chocolate and sweetened condensed milk are beautifully melted and combined, remove it from the heat.
Stirring in the Peppermint Perfection
Now for the signature festive flavor! Once your chocolate base is smooth, it's time to incorporate the peppermint extract. Add it gradually, stirring thoroughly, and tasting a tiny bit to ensure it reaches your desired minty intensity. Remember, extracts are potent, so start with a smaller amount and add more if needed.
Many recipes, especially those aiming for a visually stunning presentation, suggest creating layers. A popular variation involves making a first layer of plain chocolate fudge, chilling it briefly, and then creating a second layer of white chocolate fudge infused with peppermint extract and crushed candy canes. This creates a beautiful contrast of colors and textures. To achieve this, you'd repeat the melting process with white chocolate chips and sweetened condensed milk for the top layer, then fold in the peppermint extract and a generous amount of crushed candy canes before spreading it over your chilled chocolate base.
The Anticipation of the Chill
Once your fudge is mixed and spread into a parchment-lined pan (an 8x8 or 9x9 inch pan is ideal), the hardest part begins: waiting! Chilling is crucial for the fudge to set properly, resulting in firm, sliceable squares. Refrigerate your fudge for at least 2 hours, or until it's completely firm. Some recipes, especially those with multiple layers, might benefit from a slightly longer chill time. This waiting period also makes peppermint fudge an excellent make-ahead treat for holiday gatherings or homemade gifts.
Customizing Your Peppermint Perfection
While the classic
peppermint fudge recipe is a winner on its own, one of its greatest strengths is its versatility. You can easily elevate it with additional toppings and slight variations to suit any palate or occasion.
*
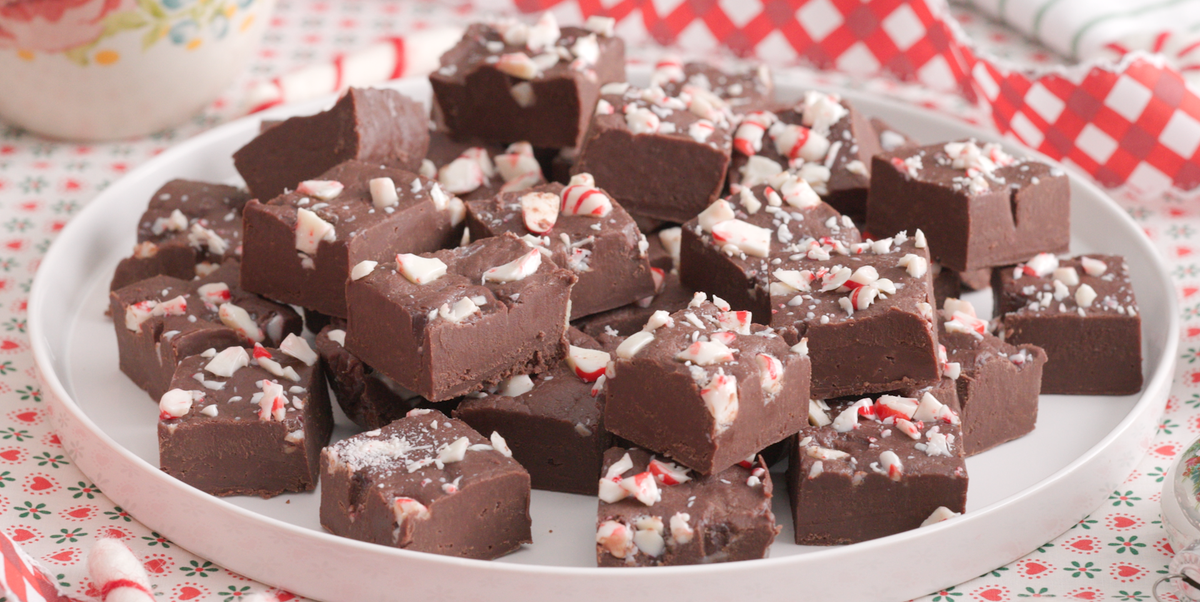
Classic Candy Cane Topping: The most iconic topping for peppermint fudge is, without a doubt, crushed candy canes. Sprinkle them generously over the top of your fudge *before* it sets in the refrigerator. The candy canes provide a delightful crunch and an extra burst of minty freshness, adding to the festive visual appeal.
*
Nutty Additions: For those who love a hint of savory crunch, consider adding chopped toasted pecans, walnuts, or even peanuts to the top of your fudge. The nutty flavor beautifully complements the chocolate and peppermint.
*
Salty Surprises: A pinch of flaky sea salt sprinkled over the top can miraculously enhance the chocolate and peppermint flavors, creating a gourmet experience. Crushed pretzels also offer a wonderful salty counterpoint and textural contrast.
*
Other Sweet Enhancements: Get creative with toffee bits, mini chocolate chips, sprinkles (especially holiday-themed ones!), or even colorful chocolate-covered candies. These add visual interest and layers of flavor.
*
White Chocolate Drizzle: For an extra touch of elegance, once the fudge is set, melt a small amount of white chocolate and drizzle it decoratively over the top.
*
Chocolate Choices: Experiment with different types of chocolate. While dark and semi-sweet are popular, an all-milk chocolate base can create an even sweeter, creamier fudge.
Don't be afraid to experiment! The beauty of this easy recipe is that it's very forgiving, allowing you to personalize each batch.
Tips for the Best Peppermint Fudge Experience
To ensure your homemade peppermint fudge is nothing short of spectacular, keep these practical tips in mind:
*
Line Your Pan: Always line your baking pan with parchment paper, leaving an overhang on the sides. This makes lifting the set fudge out of the pan incredibly easy, allowing for clean cuts.
*
High-Quality Ingredients: While this recipe is simple, using good quality chocolate can significantly impact the final flavor and texture. You don't need the most expensive, but avoid overly waxy or artificial-tasting chocolate chips.
*
Don't Over-Microwave: If using the microwave, under-melting and stirring is better than over-melting. Chocolate continues to melt from residual heat, so stir until smooth even if it looks like there are a few tiny lumps remaining.
*
Clean Cuts: Once chilled, use a sharp, warm knife (run it under hot water and wipe dry) to cut your fudge into neat squares. Clean the knife between cuts for the best results.
*
Storage: Store your peppermint fudge in an airtight container at room temperature for up to a week, or in the refrigerator for up to two weeks. It also freezes beautifully for up to three months.
*
Gifting: Peppermint fudge makes a delightful homemade gift! Package squares in festive tins, cellophane bags tied with ribbon, or small decorative boxes.
A Festive Treat Awaits
This
peppermint fudge recipe isn't just a dessert; it's a testament to the joy of simple pleasures and the magic of homemade treats. With its straightforward "melt, stir, chill" methodology, vibrant peppermint flavor, and endless customization possibilities, it's the perfect sweet addition to your holiday season. Whether you're a seasoned baker or new to the kitchen, this easy fudge promises festive fun and delicious results. So gather your ingredients, embrace the holiday spirit, and get ready to create a batch of peppermint perfection that will delight friends and family alike. Enjoy the sweet, minty taste of homemade happiness!